Sunday, April 29, 2012

New Raised Beds

We now have two more raised beds.  Yippee!  I'm hoping & praying that this means we will have more fresh veggies this summer.  And some to store away for winter too.

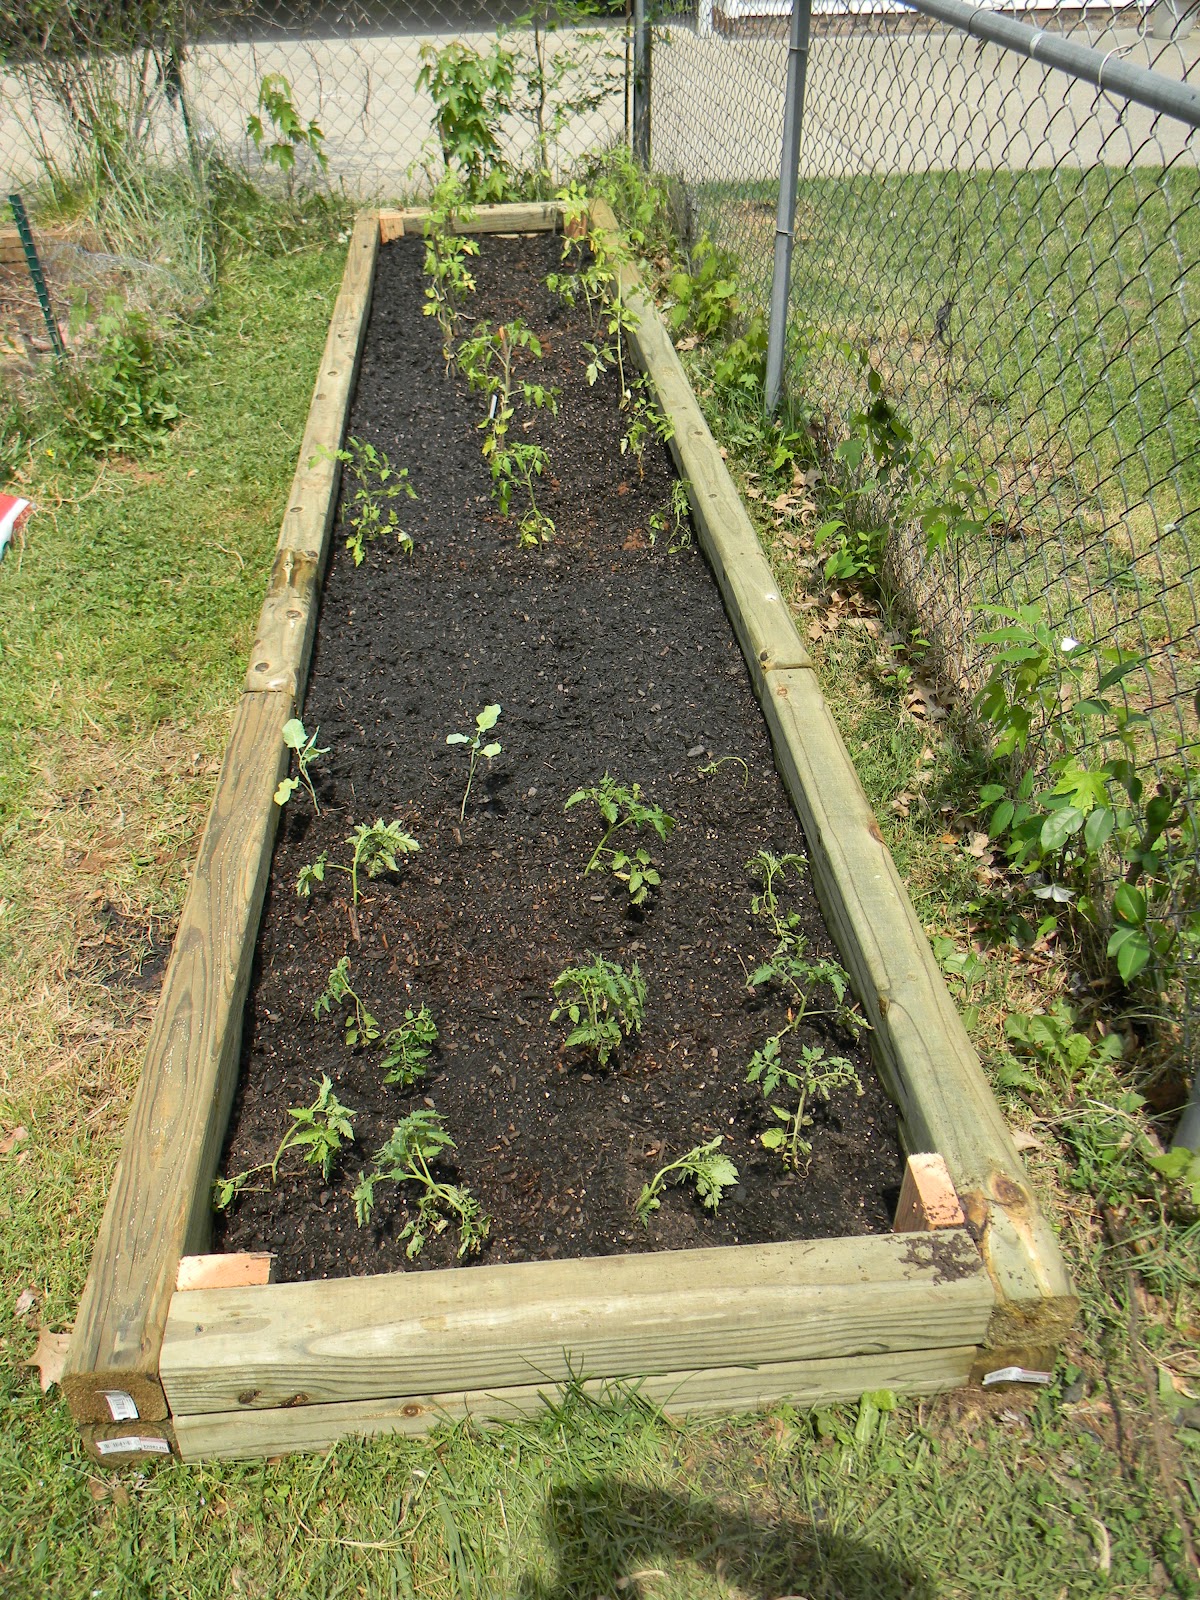
Dave made this long one over by the fence.  It is at the end of one of our original beds.  We agreed to make it not as wide as the original two.  This way it will be easier to weed & harvest.
-
I planted it this morning. 

I planted 3 different types of tomato plants. The space that looks blank is where I planted cilantro & parsley. The area in front of the tomato plants I used to plant lettuce seeds. There are a couple of broccoli plants in front of the smaller tomato plants. I'm trying hard not to waste any space.

Dave came home from church & and started making a 4th raised bed. The plan was to put it on the back of the house.  He made it the same measurements as the other new one.


We soon realized that one of the wires to the shed ran under most of the raised bed.  Because of this we decided to move it to the opposite side of the yard.  Sweet Pea, Dave & I all strained to carry it across the yard.  That thing was heavy!

Boo Bear & I filled it up with lots of soil.  It took quite a few bags to fill it up. 

Here it is all planted.  Whew!

Better Boy tomatoes from Lowes are on the end.

The seeds I planted are lettuce, spinach, Morning Glories, sunflowers, watermelon, zucchini, green beans & peas.  Praying hard!


Monday, April 23, 2012

Super Science

Mr. Rich teaches this class.  In March he taught about Simple Machines.


 Mr. Rich explains force & motion.

 Bugsy starts to build his catapult.


 It all comes together & Bugsy is totally into it.  I love his expression!

 Boys vs. Girls

Mr. Rich explains how to fire the catapult.

 And the War of the Marshmallows begins!


Bugsy fires!

 Bugsy's catapult

 Next they learned about kinetic energy & potential energy.

 To illustrate these forms of energy Mr. Rich had the kids race these rubber band wind up cars.

It was Bugsy's turn.  Off it goes!


 Mr. Rich explains one more example of a Simple Machine.

 The kids took turns screwing & unscrewing the screws in the chairs.

As promised at the end of class Mr. Rich shared the leftover marshmallows with the children.

Bugsy even came over and shared some with me.  Wasn't that sweet?

Sunday, April 22, 2012

Saturday, April 7, 2012

Newspaper Planters ~ How Cool Are These?


Here is the post on how to make newspaper planters that I promised everyone. I heard of these & knew I wanted to try to make them. After a quick search on Google I found several article & a few YouTube videos. I am one that needs to see it being done in order to get it. I didn't make a video but did take pics for you to see the step by step process I used. Ready?

First get one, full page of newspaper. You want to open it as if you were going to read it. Then fold it in half. If you fold it the other direction it doesn't work as well. Trial & error speaking.


Now fold it in half again. Now you've folded it twice.

Now take a glass and place it halfway down the folded paper. A tall 8oz. glass works best.

Roll the glass in the paper. You need to do it tightly but not so tightly that you can't remove the glass once it is all rolled.
You'll get the feel of it after making a planter or two.

Keep rolling it until you have completely rolled the entire paper around the glass.

Once you are finished rolling it should look like this.


Remember how you placed the glass only halfway on the paper? Stuff that paper that is not directly wrapped around the glass into the mouth of your glass. That paper will make the bottom of your planter.

Remove the glass.

This is what it looks like after removing the glass.

To form the bottom of your planter put your glass back in the planter. Use the bottom of your glass for this.

Push the bottom of the glass down. This will squash the paper you crumpled inside and make a firm bottom for your planter.

Take your glass back out again. I usually help make sure the bottom is in place.

A view of the bottom. Now it will hold dirt nicely.

Two finished planters.

A homemade strawberry smoothie to help me work. It isn't a must to make a good newspaper planter but it does help. Lol!

My little audience.

Once I got the hang of it they went pretty fast.

It must have looked fun because Sweet Pea kept asking to try.

Soon we had a 3 flats of planters made.

My outside work station.

Filled with dirt & busy planting!

I recommend putting them in flats or pans. You need something underneath for when you water them. We got free flats at our local Aldi.

Cucumbers, zucchini, Butternut squash & Acorn squash.

One article I read said you can put the planters straight in the ground when you are ready to plant your big garden. Another said the newspaper takes quite awhile to break down enough so the roots can get through. I have decided to take mine out of the planters when I plant. Because of this I went ahead and used masking tape to label most of my plants. Either way it's a great way to reuse your newspaper & keep those plastic planters out of landfills! Oh, and to save some money too! I don't know about you but I love making something new from something old! =0)